Effortless Website Hosting with WordPress on OpenLiteSpeed
WordPress is a popular content management system that is used to create websites and blogs. It is known for its ease of use and flexibility. OpenLiteSpeed is a web server that is known for its speed and performance. It is a good choice for hosting WordPress websites.
WordPress stands out for its ease of setup and maintenance, offering versatile solutions ranging from e-commerce websites to personal blogs to cater to varied needs. While web servers like Apache, Nginx, and OpenLiteSpeed can all host your WordPress website, OpenLiteSpeed distinctively outshines the rest with its remarkable performance.
Establishing a Foundation: Set Up with GCP
Selecting a Cloud Provider
Begin by selecting a cloud provider, such as Google Cloud Platform (GCP) or Amazon Web Services (AWS), and set up an account on their free tier. This guide will utilize GCP, focusing on an e2-micro VM instance within specific US regions like Oregon, Iowa, and South Carolina.
Configuring the VM Instance
Create a VM instance in the GCP Console and obtain a static IP address from the VPC network section. Connect the static IP to the VM instance, and this will be the IP that you will use from now on. To connect to the server, use SSH from the VM instance section of the GCP Console.
Installing and Configuring OpenLiteSpeed Web Server
Downloading and Installing OpenLiteSpeed
OpenLiteSpeed can be installed using various methods. For this use case, let’s go with the manual installation via binary download. Run the following command to download, unpack and install it:
wget https://openlitespeed.org/packages/openlitespeed-1.7.16.tgz
tar -zxvf openlitespeed-*.tgz
cd openlitespeed
sudo ./install.sh
/usr/local/lsws/bin/lswsctrl start
Starting the Web Server and Securing the Admin Screen
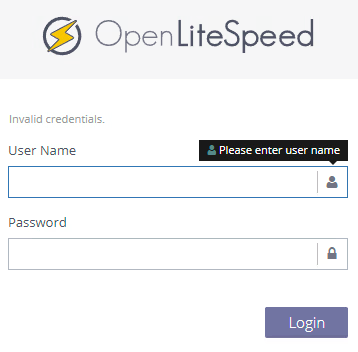
After successfully starting the server, navigate to the admin screen using the public IP address and port 7080. Ensure you log in securely, and consider limiting access to the admin screen to your IP address (search “what’s my IP” on Google) to enhance security.
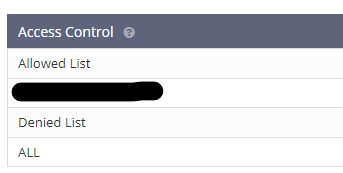
As a suggestion, let’s block access to this admin screen by only allowing the IP address we currently reside in. This can be obtained by using Google. Once obtained, open the “WebAdmin Settings” section within the admin screen and go to “General”. Scroll to the bottom and edit the “Access Control” section. The IP will go into the Allowed List and ALL will go into the Denied List.
WordPress Installation and Database Management
Updating lsphp and Configuring LightSpeed
After successfully restricting unauthorized access to the OpenLiteSpeed admin screen, the subsequent steps encompass updating lsphp, installing a database management system, installing WordPress, procuring a domain, and establishing SSL.
To update lsphp to a proper version, at the time of this article is 8.1, run the following command:
sudo apt install lsphp81 lsphp81-common lsphp81-mysql lsphp81-memcached lsphp81-redis lsphp81-opcache lsphp81-curl lsphp81-imagick -y
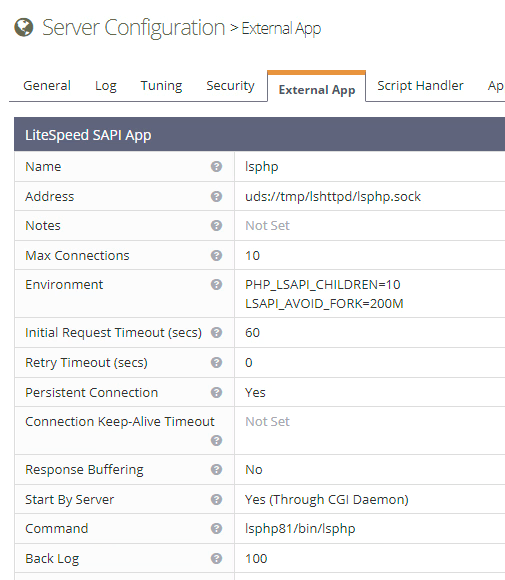
After completing these steps, go to WebAdmin Console > Server Configuration > External App > lsphp in the LiteSpeed admin screen and update the Command value to lsphp81/bin/lsphp. This will ensure that your WordPress site uses PHP version 8.1.
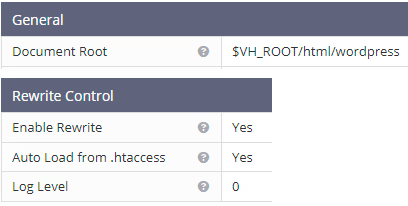
LightSpeed must be configured to point to the location where we will install WordPress. Within the admin screen, go to Virtual Host -> Example -> General tab.
- Update the Document Root to $VH_ROOT/html/wordpress
- Update Index Files: index.html, index.php
Go to the Rewrite tab.
- Enable Rewrite: Yes
- Auto Load from .htaccess: Yes
This is the simplest way to get started. Later, you can create a new virtual host and listener. The best thing about this is that you can host any website here, not just WordPress!
Connecting to the Database and Installing WordPress on OpenLiteSpeed
Setting Up a Database for WordPress in GCP
Although utilizing GCP for database management incurs a cost, using MariaDB on the Linux system can be a cost-effective alternative. If opting for GCP’s SQL service, ensure to create a user, a new password for root, and a database schema, noting down all credentials for future use.
Please note, there are always cheaper options. This is a preference because being in charge means nothing is ever out of reach. Services can always shut down or close it’s doors leaving everything that was built gone.

- Enterprise
- Preset: Sandbox
- Machine Configuration: Shared core (1 vCPU, 0.614 GB)
- 10 GB Storage
- Public IP, Connection will be done with Cloud SQL Proxy
- Remove daily backups
Once completed, open the instance up, within this we will create a new password for root, create a new user, and a database schema. Use built-in authentication, other options are available but that’s outside this scope. Ensure to note down the username, password, database name, and connection string.
Within Users, create a new user AND change the password for ROOT.
Within Databases, create a schema, keep it simple “wordpress_test”.
Utilizing Cloud-SQL-Proxy for Connection
To connect to this database from our instance, let’s use cloud-sql-proxy. Implement the series of commands below to set up the gcloud CLI, authenticate, obtain the cloud-sql-proxy, and ensure it is executable.
apt-get install apt-transport-https ca-certificates gnupg curl sudo

echo "deb [signed-by=/usr/share/keyrings/cloud.google.asc] https://packages.cloud.google.com/apt cloud-sdk main" | sudo tee -a /etc/apt/sources.list.d/google-cloud-sdk.list

curl https://packages.cloud.google.com/apt/doc/apt-key.gpg | sudo tee /usr/share/keyrings/cloud.google.asc

sudo apt-get update && sudo apt-get install google-cloud-cli

gcloud auth login
gcloud auth application-default login

//README Learn More
//https://github.com/GoogleCloudPlatform/cloud-sql-proxy/blob/main/README.md

curl -o cloud-sql-proxy https://storage.googleapis.com/cloud-sql-connectors/cloud-sql-proxy/v2.7.0/cloud-sql-proxy.linux.amd64

chmod +x cloud-sql-proxy

./cloud-sql-proxy --run-connection-test <INSTANCE_CONNECTION_NAME>

//Runs proxy in background as a daemon
//use this so that it's running in the background
./cloud-sql-proxy --quiet <INSTANCE_CONNECTION_NAME> &
Starting the cloud-sql-proxy will open a service on 127.0.0.1 and port 3306 (default for MySQL). This will be used during the setup of WordPress. Download and extract WordPress with the following commands:
wget -c http://wordpress.org/latest.tar.gz
sudo tar xvzf latest.tar.gz -C /usr/local/lsws/Example/html/
By using chown, set the WordPress folder to the proper owner, in this case the default is nobody:nogroup.
sudo chown -R nobody:nogroup /usr/local/lsws/Example/html/wordpress
Bravo On Your Self-Hosted WordPress Site
We’ve successfully created and hosted our own WordPress site on OpenLiteSpeed via GCP! Navigate through the site @ http://your-static-ip-address and follow the on-screen prompts. All the aforementioned steps will be used during the initial startup of WordPress. Our next article will provide a guide on obtaining a Domain and setting up HTTPS (SSL) on your WordPress Site.
Let me know in the comments below if there were any issues or if this helped out in any way! Check out my other articles.
Subscribe to our Newsletter!
Leave a Reply